|
This page will act as a photographic journal. What I'm using, why I like various bits of kit, how I set up certain shots. Stuff that on the whole would act as a massive turn-off for anyone not interested in wildlife photography. Lesser Antillean Bullfinch
November 22, 2013
•
Leave a Comment
Lesser Antillean Bullfinch was one of the most common residents of the hotel gardens on St. Lucia, and they clearly know a good thing when they see it! Free and easy food! Along with the Grackles they were an omnipresent feature of all meals, seeing what crumbs they could scavenge, and I have to say they are absolutely delightful. Our room was a tree height with a lovely roof terrace, and a pair of these birds visited us regularly to see what was on offer. Upon arrival we were given some plantain chips, and those that I didn't scoff were eagerly consumed by these birds over the following few days. They were completely fearless, perching on the arms of chairs we were sitting in, on the table we were eating from, and even landing on my beer a few times. Because they were so accustomed to human presence, they rarely seemed to perch on anything that might be described as natural, so instead I enjoyed myself trying to capture their extremely cheeky nature, composition be damned!
The ultimate travel lens for bird photography?
November 13, 2013
•
Leave a Comment
I replaced my older 500mm f4 with the 800mm f5.6 in 2012. This opened up new avenues for me in bird photography, the extra reach is phenomenally useful. It doesn't weigh a huge amount, but at some point that year I strained my side and it hasn't ever got better. Was it to do with carrying the lens? I don't know - it could have been on Shetland that autumn, where I carried it all day every day. Anyhow, carrying the 800mm now, even though only 700g heavier than my old 500mm, seems now to make an adverse difference to me. If I'm working close to the car, and I know the bird is a small one, the 800mm comes every time - for instance the Red-backed Shrike at Canvey earlier this year (and, I wish, for the Nottinghamshire Pied Wheatear but I didn't even think that would be photographable!). But I'm not sure I'd like to carry it around with me all day long any longer - I must be getting old! However birds in this country tend not be particularly approachable, and for that reason I choose to keep it, as it gives me a huge advantage, but it's not a lens that I actively carry around just on the off-chance that a photographic opportunity might arise. In other words it has very specific uses, but is not what you might call versatile. And it's huge!. Many airlines in Europe have prohibitively small hand luggage allowances, and as you know I have started to travel quite a bit. I realised that with my dodgy side and increased travel that selling my old 500mm might have been a mistake. Such is life, you don't know what you miss until it's too late. There was only one thing for it - start saving to buy it back! In the meantime of course, Canon released a new 500mm, the Mark II. It weighs 600g less than the old version (18%), focuses closer, and has a more effective IS system. The older lens was no slouch in the quality department, and this new version is at least its equal, and the fact that I had to tone down my Photoshop sharpening points to the fact that it is even better. The only trouble is that it was nearly double the price of the older second hand model. I agonised for a while, and then took the plunge - you only live once. And I am glad I did, the new 500mm F4 IS Mark II is an incredible bit of kit and I get stacks and stacks of use out of it. Having now used it extensively for about a year I can't think of a lens better than this one for general birding, or travel where birds might be on the menu. For starters it packs into a tiny bag, unlike the 600mm and 800mm. The value of this cannot be underestimated, it is so easy to pack. I can take this lens anywhere, even on the smallest of planes, nobody ever questions the small bag, which also contains a 1d body alongside (i.e. not mounted), both converters, a standard sized lens like a 100mm macro or 16-35mm zoom, and various small items like batteries and cards. Monopod strapped to the side, I have a package that can go anywhere for bird photography and be perfect for most birding situations. Partnered with a 1d body it weighs in at less than 5kg. I can handhold it all day long, and with my unique horizontal carrying system I barely notice it on my shoulder if I'm out birding, and it seems not to aggravate my side too much. I've been doing a fair bit of travelling this year, and this lens has been everywhere with me. Without even a monopod, I'm finding that it delivers great image quality time after time. And it takes the 1.4x converter without blinking. I swear I can't tell if I used it or not. On my recent holiday to St. Lucia, I used it handheld 90% of the time, often with the converter, and I'm perfectly happy with the results. It takes the 2x pretty well too, and just this past weekend I used it with both converters stacked around a 12mm extension tube with perfectly acceptable, if not spectacular, results. The cost is the only downside, especially when a mint example of the older model can be had for around 60% of the price at the time of writing, or a saving of over £3000 - this amount could take you a long way! Below, a female Antillean Crested Hummingbird, taken handheld at 700mm (f7.1, 1/2000s, ISO 1000)
Grey Kingbird, St. Lucia
November 12, 2013
I love Kingbirds, giant Flycatchers with huge beaks that could almost be Shrikes, and thus are awesome. I'd been hoping to get some close encounters with Grey Kingbird, the species present on St. Lucia, and sure enough on our one trip away from the hotel we came across three or four on a track adjacent to some cultivated land high up in the hills. I had forgotten both my monopod and converter, so these were with the handheld 500mm, slowly approaching. This worked relatively, and produced a couple of images I was happy with, particularly the second one, which even though smaller in the frame is pleasing somehow (to me at least!). Although the birds were relatively cooperative, we were actually on a birding mission, so I had to move on.
The following day once back in the hotel, or maybe the day after as I tended to lose track of time, I discovered a bird frequenting a less manicured part of the grounds, and spent a good hour or so taking photos, this time armed with all the kit I hadn't had with me in the hills. The only place it would perch at eye level was a fence, but it's quite a nice fence with a nice clean background, and definitely preferable to having the bird from below and framed against a white sky. All of the images were at 700mm (i.e. with the 1.4x converter), and I used the monopod for support. The bird never came back to the same bit of fence, and although it fed relatively frequently I frustratingly never chose the right part of fence for a landing shot, and after a while I got a bit hot and retired to the Caribbean Sea for a spot of snorkelling, all thoughts of photography forgotten!
Citrine Wagtail on Shetland
October 25, 2013
•
1 Comment
Photographic opportunities were few and far between on Shetland. On the islands for a mere three and a half days, the mission was bird finding, not bird photography, and the weather was predictably poor for a lot of it. The camera came out of the bag perhaps three times, and one of those was for a first winter Citrine Wagtail right at the end of the day. Light was really poor - I know, excuses, excuses - and I was without my main monopod which was still in my suitcase in Aberdeen! I had a spare monopod but unbeknownst to me the stop screw on my arca-compatible 4th Gen Design lens foot meant that it wouldn't slide into the Kirk clamp - note to self, check these things before leaving! The jaws on my regular Wimberley clamp open far wider - anyway, the end result was that the lens was clamped to the monopod by about 5mm, and was as a result not perfectly stable - I could easily feel the play! Really not ideal, and with the light going I was forced to pump up the ISO to 1250. The bird was frequenting a slurry pit, or sileage run off. I have no idea what you call it, but effectively it was 90% liquid cow shit as far as a I could tell. Even I wasn't prepared to lie down flat, especially with no spare clothes! Crouching was the best I could do, and tried to brace the rig as best I could on slightly dodgy support, and even then it was pretty unpleasant. The bird seemed to be frequenting the darkest and furthest corner, but also would come close to people around the outside, so knowing I didn't have long, when the bird next flew away and over the barns I went and crouched in the space nearest to the corner that was clear of brown liquid! I had to hop, skip and jump to get there, but this bold move was rewarded when the bird flew back in and came in really close, completely unconcerned by my presence. So I was in position, as close as I could get, I was as low as I could get, now the bird just had to stay still! To cut a long story short, it didn't! In active feeding mode, only very occasionally did it stop for a split second, and as a result most of my photos are complete garbage! Some however came out OK, despite the tough conditions. All taken with the 500mk II + 1.4x converter, ISO 800-1250, and unusually for me, on Aperture Priority mode, which I figured would keep me right as the bird moved in and out of darker areas.
The Editing Process - to keep or not to keep
October 12, 2013
•
Leave a Comment
As I get more ruthless with paring my images down, a process which I only truly got to grips with this year, and which I continue to improve upon, I thought it might be interesting to share my thought process as I go through my RAW files on the computer. Largely this involves THE BIN! These steps are more or less in order, and each ends with the bin, unless it makes it through that step. So for instance if the image is sharp enough it goes through to stage two, but if I'm missing part of the bird it goes. If I have an entire bird that is sharp, but the exposure is off, then I bin it. If the exposure is OK, then it makes it to stage four, and so on. Or at least that is how I suggest you look at this if you doing this very strict selection process for the first time. Probably in reality I do many of the steps simultaneously, especially the first five. But anyway, here is what I think about when I am reviewing images that I have just downloaded. Also worth noting is that I use a piece of software called Breezebrower Pro. This is a very rapid way of categorising images as keep or bin, and has the advantage of applying some standard "as if sharpened" views of the RAW images. You simply select the keepers, then invert your selection and delete the rest. 1) Is it sharp, and I mean properly sharp? None of this "oh it's ok I suppose", we're talking real sharpness. Feather detail sharpness. This particularly applies to the head, particularly the beak and the eye. Not sharp? Bin. I am mildly addicted to what I call the "Rictal bristle test". Can you see them? If you can, you're all good on the sharpness and detail front. In the image below, the left hand bird is off. The right hand bird is a lot better.
2) Have I got the whole bird? Is the tail there? The wingtips? The feet? Unless you're aiming for a tight portrait, really you don't want images which have been cut off. If I'm missing just a tiny bit, have I got that bit on another frame that I can copy across? Can I clone it in, and leave some space around it? Mostly, if I've missed it, I bin it. Cloning and copying take time. Only when I have no other choice do I go down this route. The following two side-by-side images were taken about a second apart. I realised I had clipped the tail and panned slightly to the right. If anything though, there is now not enough space on the right of the bird.
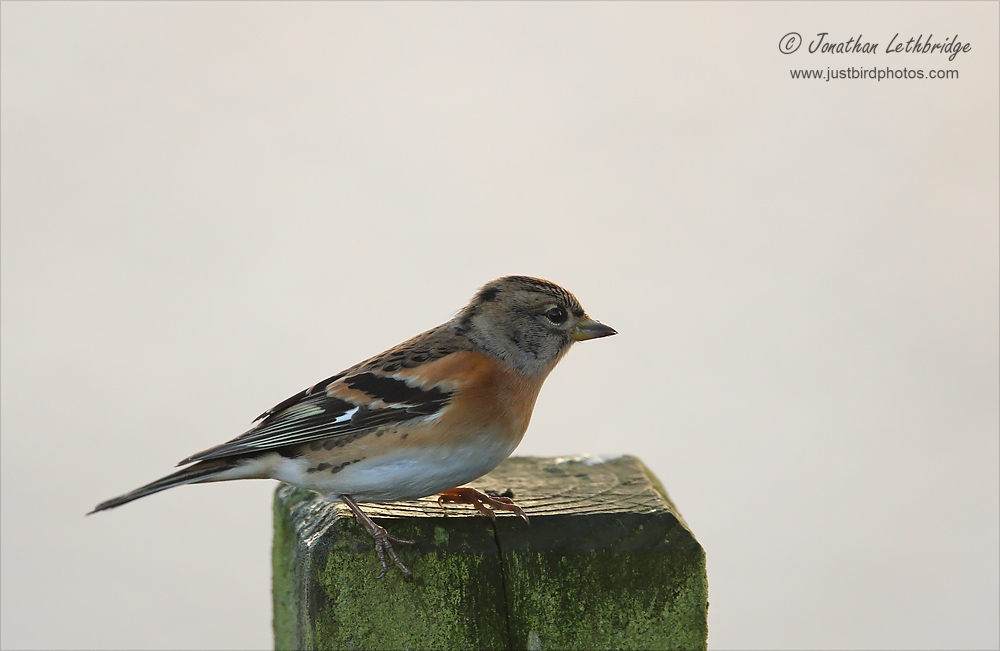
3) Is the exposure good, or at least recoverable if slightly off? No? Bin. Some images you can raise to bring them back. Lowering them is more difficult. Did I blow my whites? A bit is recoverable. A lot? Bin. To be honest this is rarely a problem as I constantly check my exposure in the field and amend accordingly. It would be extremely rare that I went through more than ten shots without checking that everything was OK, and an entire session would be unheard of. However if you're not completely at ease with exposure theory, which only comes with time, then this could be an important step. The Brambling below is too far underexposed to raise successfully - I tried and the whites never recovered. Only one place for it.....
4) Quality of light. This is in many ways connected to the exposure as detailed in #2, and also to the shadow issue as detailed in #5, but what is the light like? Images taken under a white cloudy sky are the best, direct sunlight often looks extremely harsh. Once again this is very subjective, but images taken in the midday sun are rarely better than those taken early morning or late afternoon. Softness is key. Any image which grates is destined for only one place. Most of the time I don't pick up the camera in these conditions as I know I will be disappointed. Photographers often moan about the lack of light, but too much is equally bad.
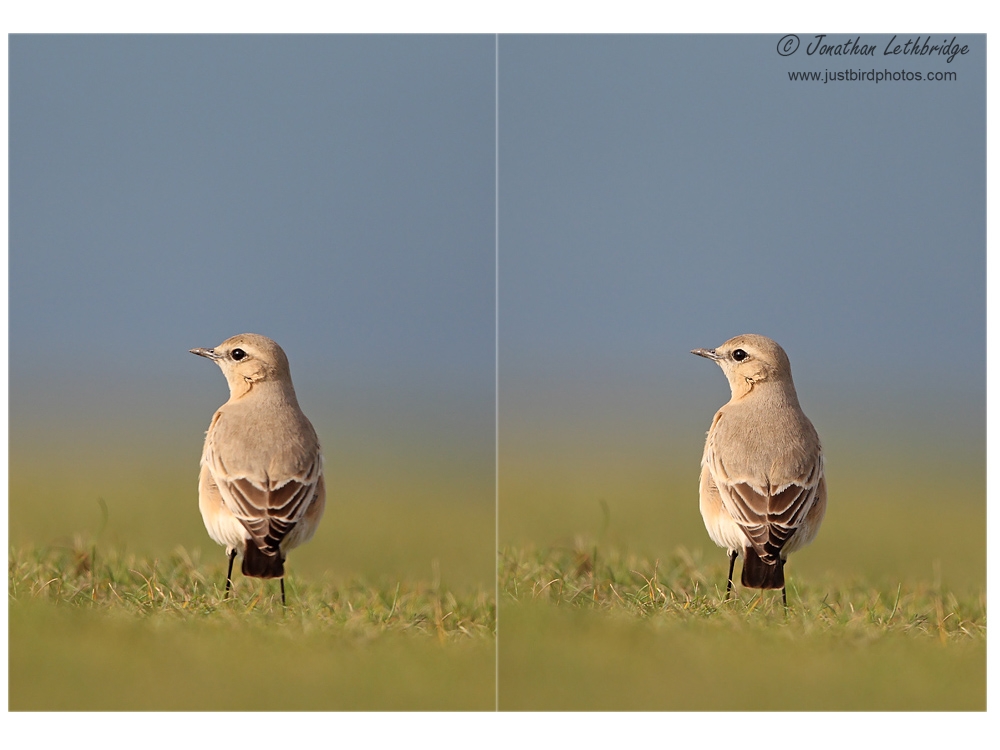
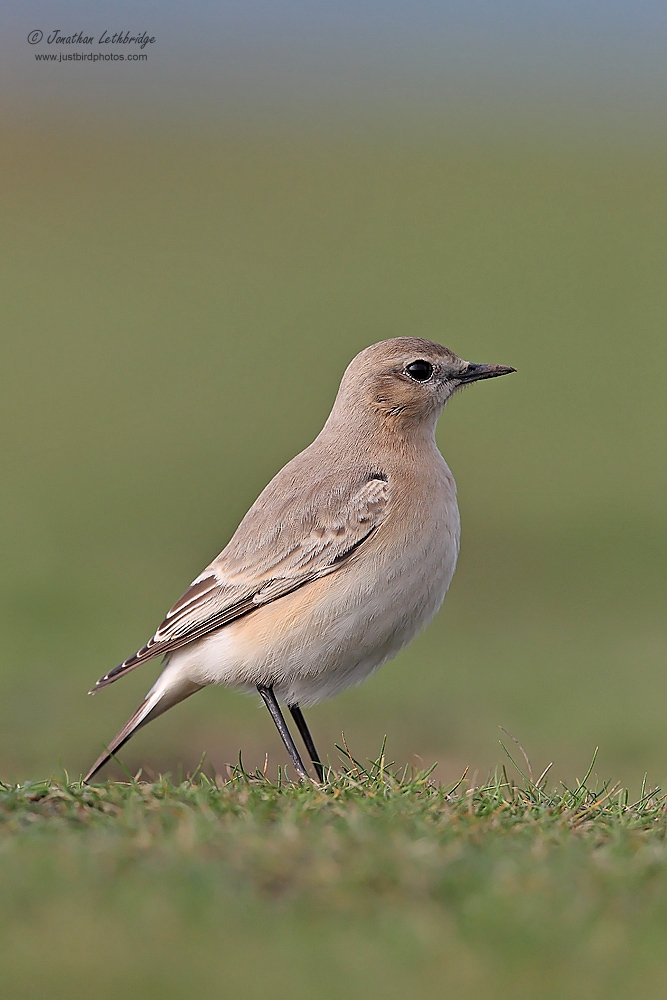
5) Head angle, position of bird? This is where we start getting subjective, but this it's one the areas where I see the most images on the net that I end up shaking my head at, knowing how easy this to get right. If bird's head is turned away from the camera, the image goes in the bin. If it's looking down, it goes in the bin. Similarly, if bird is flying away from the camera, even slightly, it's a goner. Even if it's the sharpest ever photo with a brilliantly perfect exposure, if the bird is flying away, or the head is inclined away from the camera, it fails the definition of a good photo, and goes in the trash. I lose a lot of images here, especially where I have taken a sequence knowing that at least some of that sequence will have the bird doing what I want it to do, or where it turns away as I am still firing. In the first image below of the Isabelline Wheatear from last weekend, I binned the bin left hand bird and kept the right. There is only a fraction in it but the slightly lowered head on the left means it doesn't work for me. When it raised its head slightly, I got better light on it and a catch-light in the eye. Happy days! In the second image, which is of a Northern Wheatear, it is far more subjective. Either image works, but I much prefer the one on the right.
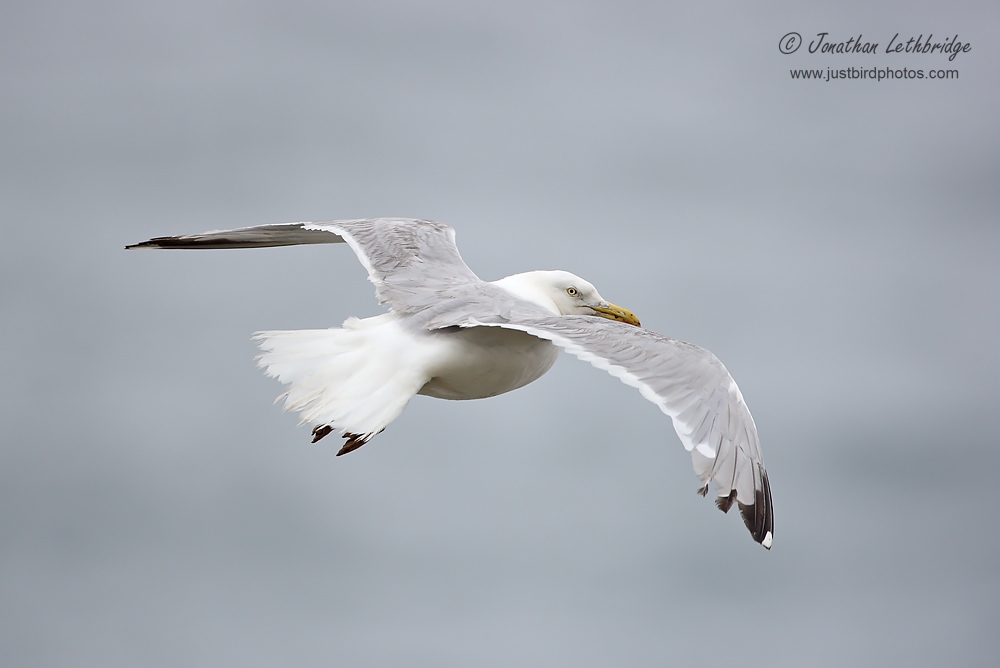
6) Shadows? Is the head in shadow? Yes? Bin it! You want a nice evenly lit bird. You ideally want a catch light in the eye. If the bird's head is in shade, you won't have either of those things. Bin! Twigs and so on, sometime even other birds, can cast shadows across a bird. The body, the head, anywhere. If you don't think you can clone it out (cloning is where you take pixels from another part of the image and paste them over bits of the image you don't like, but so that you CAN'T TELL!) then bin it. In the Izzy Wheatear image, I like the pose, but look at those shadows! Bin! The Gull would be OK, the head turn is OK and just about rescues it from the fact that the bird is flying away, but the wing cuts off some of the beak. No rescuing that, goodbye! And the Chaffinch? Check out that shadow slap bang across the body, the head isn't quite sharp, and the bird seed......oh dear.
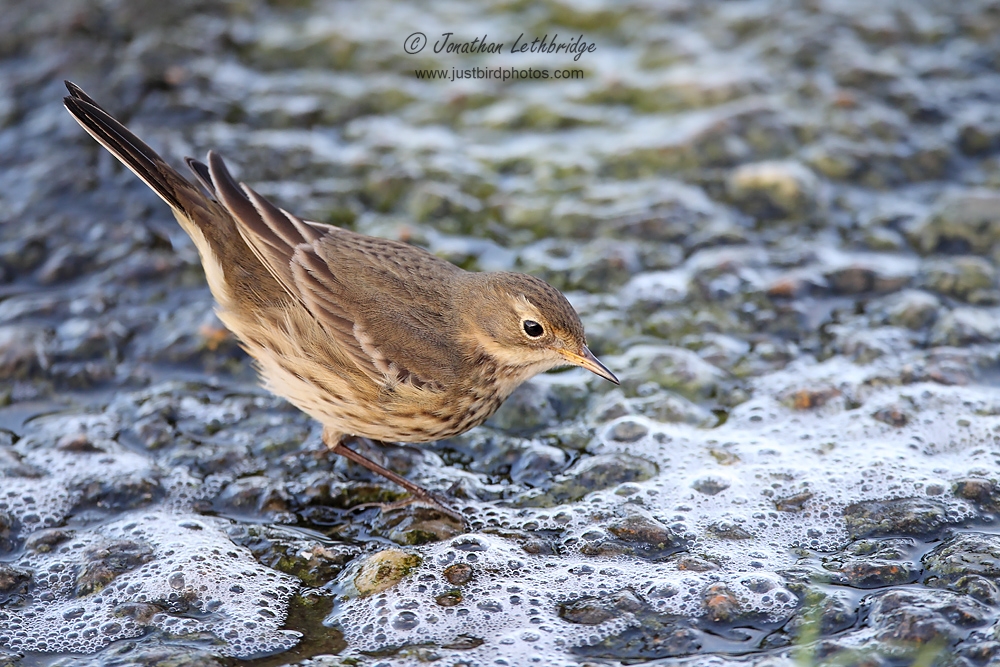
7) Shooting angle. Very important. Where was I when I was photographing the bird. Was my lens mounted on a six foot tripod pointing down at 30 degrees towards the bird, as I see all the time in the field from the no clue brigade. Or better, am I level with the bird. At eye level with it. This step barely exists in my routine these days as I am never point down, only pointing level. Very occasionally there is no option, for instance shooting over a wall, or the banks of a reservoir, but the answer there is to move back from the bird to reduce the angle, and instead add focal length if you can. I'd much rather an image taken at height with a 2x converter from a distance, than taken at a height closer and with the bare lens. If it's obvious that you're on top of the bird, bin it. The Buff-bellied Pipit below is an over-the-wall job that I could do nothing about. The image is sharp, the exposure is spot on, but I was too close, and the angle was too acute. It goes down as a better-than-average record shot, which is why I still have it to use it as an example.
8) Clutter. Is it a clean image? Very much personal taste. Some prefer the natural image, some prefer the clean image - I fall in the latter camp. Neither is better than the other, but if you're in my camp then it becomes a lot more difficult. I've deleted many a perfect image of a bird because I can't reconcile myself with the rest of the image. For instance are there twigs cutting across the bird? Can they be dealt with in Photoshop? Leaves, grass, litter, bird seed? Other birds distracting? Again, can I deal with them? I am very fussy, getting fussier, and aim not to include them in the first place, but knowing what I can and cannot do in post processing is very important. Some images just can't be worked on and if you're like me, have to be let go. I've tried to work on the Spotted Flycatcher image below many times, as with a clean background and some space out to the right, it would be a killer. It's unfortunately beyond me at the moment, but I'm saving it for a day when my photoshop skills are better.
So, a lot of this is probably obvious, but not necessarily if you took the photo. It certainly wasn't obvious to me for many years, and it has only really begun to click in the last 18 months. Before that I was willing to accept any old rubbish if it had one good element to it. I'm still working on it, still learning, and no doubt there are photos in my galleries that don't reach the standards I'm describing. I'm planning another edit soon, the final one following two immense purges. I had one go myself, and then passed my portfolio to a fellow photographer to cast an impartial eye. I return, I went through his. It's a healthy exercise to go through now and again - what I thought was brilliant two or three years ago I look at now and wonder what drugs I was on. No doubt the same will apply a couple of years from now when I look at my output from this current period. As well as going through my galleries on this website and pressing the delete key a lot, I also went through my entire collection of RAW files from about 2007. I deleted gigabytes and gigabytes, it was quite incredible. And although that sounds like it ought to have taken ages, it didn't really. It was all obvious, and most of the images I deleted were straight bins, without a second glance. Many of them I could not believe I had even taken in the first place. Forget about c&c on the web, most of it is meaningless drivel that won't help you in the slightest. Take as many photos as you can, but only press the shutter if the image there to take. If you set yourself high standards, my experience is that gradually, slowly, it will all come together. I binned the image below, can you see why?
|